It used to be perfect for apéro, and since those days are on pause I’ve started making it regularly, for no particular reason. Every few weeks recently, so that it can be there for a quick lunch or ‘Abendbrot’ dinner (German for bread and cheese and cold cuts, in this house usually also with soup or salad), or even breakfast. It has become part of a rhythm, like my weekly bread.
Chicken livers in any form is one of my favourite things, and this has become indispensable. It’s always devoured and often fought over in this house. So easy to make (thirty minutes) and completely addictive.
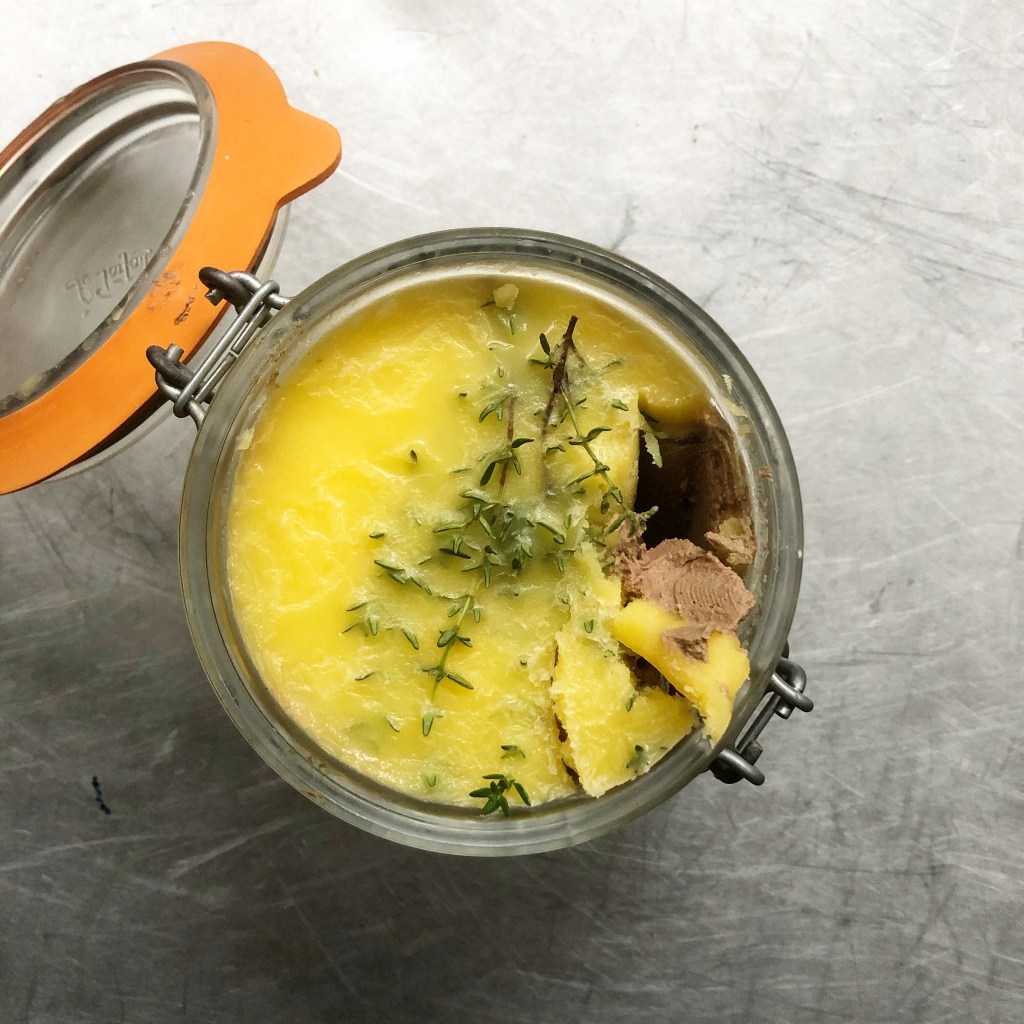
Chicken liver mousse
This is very similar to my chicken liver terrine from ten years ago, but processed into an unctuous mousse. So in the absence of a food processor, the livers can be chopped by hand.
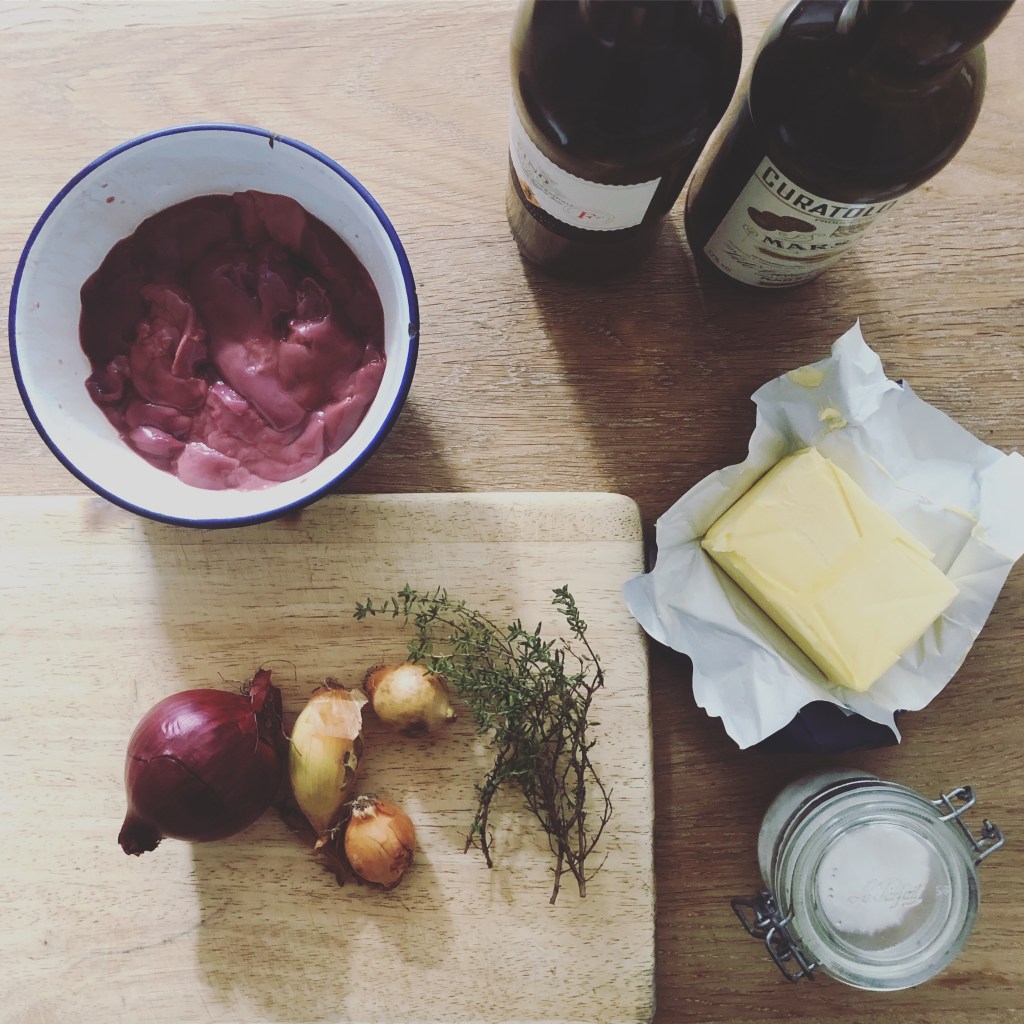
600g chicken livers
300g butter + Olive oil
3 shallots or small onions, thinly chopped
Fresh sage and/or thyme
Brandy and port (or marsala or Madeira, whatever is open and on hand)
Salt and pepper
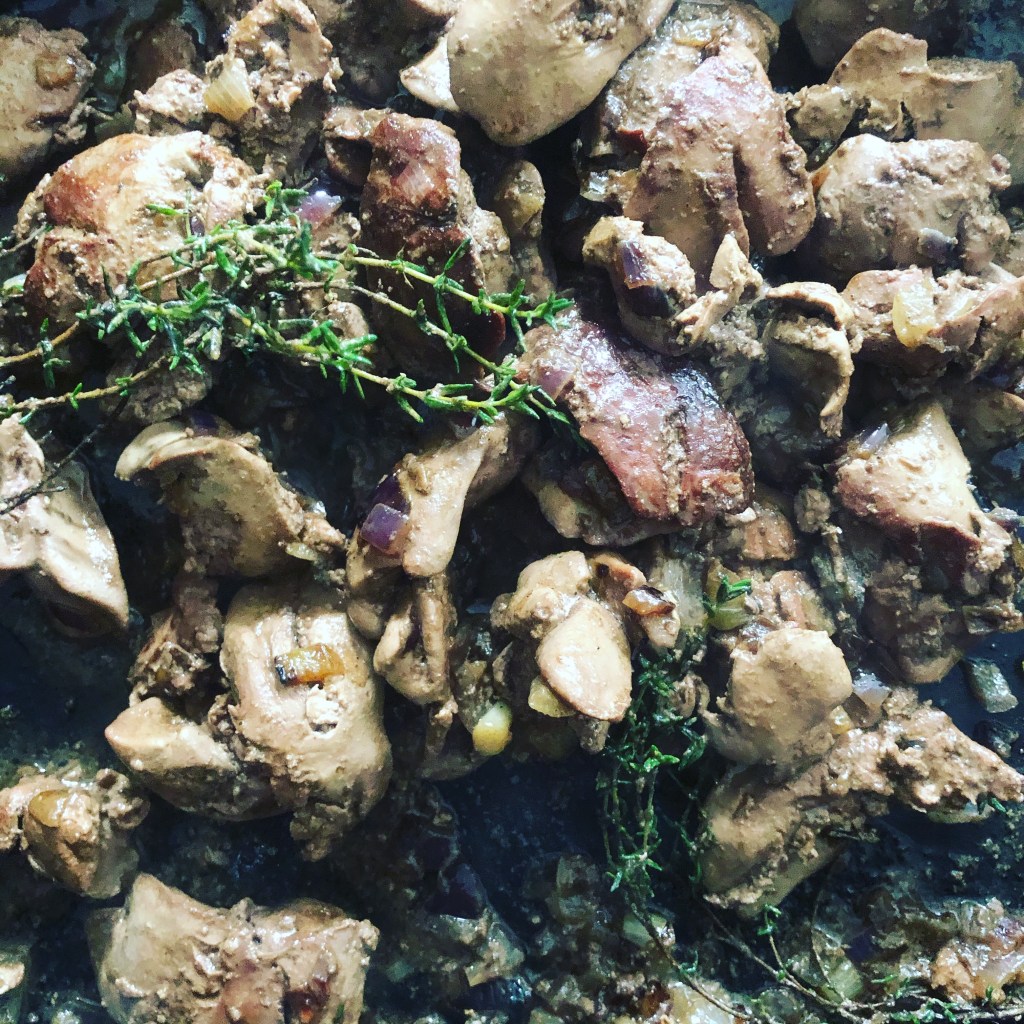
‘Trim’ the chicken livers, meaning cut off the sinew and carefully remove any green (it’s the gallbladder which is bitter).
Melt the butter in small saucepan, reserving a large tablespoon to cook the livers. Once melted, remove from the heat and set aside.
Meanwhile, heat a large frying pan with the reserved tablespoon of butter and a little olive oil. Add the shallots (or onions) and cook gently until translucent and just barely starting to brown.
Turn up the heat and add the livers, drained of any excess liquid (otherwise they will stew rather than brown). Cook over high heat, turning over once, for 3 to 4 minutes, until starting to brown.
Lower the heat to medium, add the herbs and give them a swirl in the pan to meld the aromas. Now add a few glugs of alcohol, about two tablespoons each of the sherry and marsala (or port).
Continue cooking for a minute or two until the livers are just cooked through (cut one open to check — it should be pink).
Transfer the livers and onions (take out the herbs) to a food processor. Process until blended. Add about 250g of the melted butter gradually to whip up a mousse. [=> Reserve just enough butter to cover the mousse with a layer of fat at the end.] Taste. Season generously with salt and pepper. Taste again.
Transfer the mousse to a bowl or terrine, cover with the remaining melted butter. Let cool before transferring to the fridge for a few hours at least.
The mousse keeps for a couple of days.