Archive for the ‘Seasonal’ Category

Clafoutis de Lily

1 July 2014

photo(24)

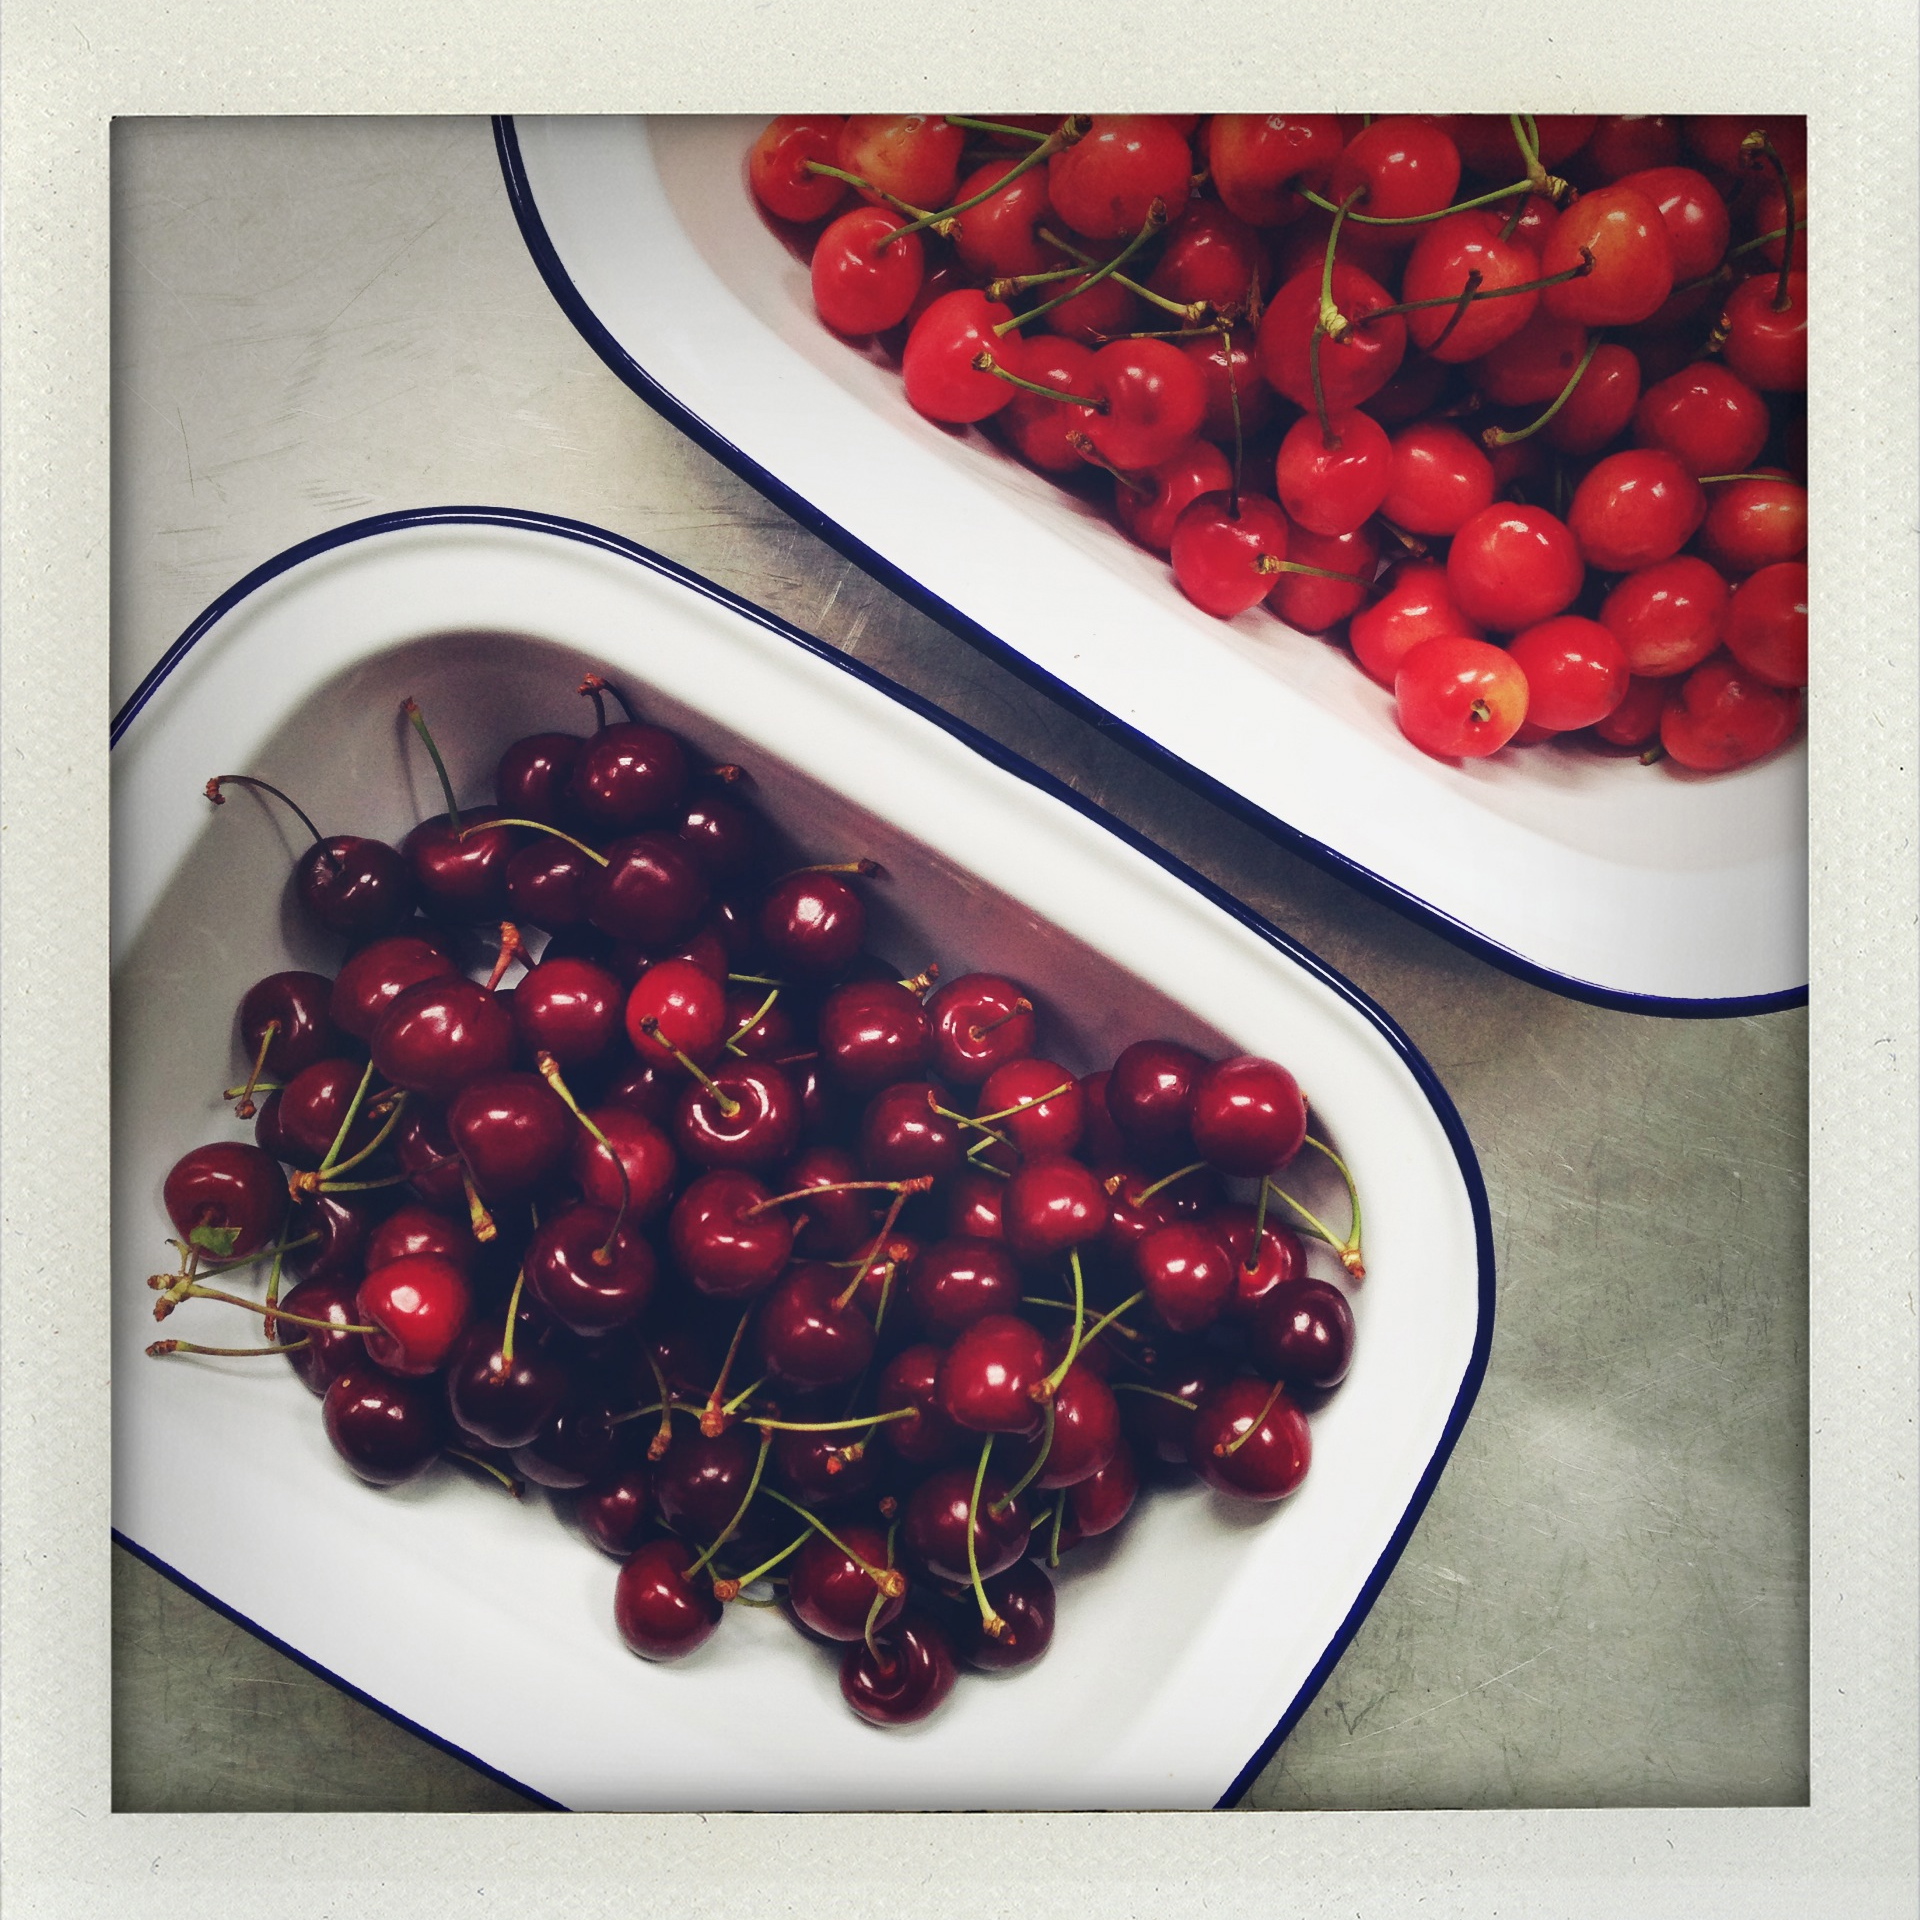
There are two schools when it comes to cherry clafoutis. Those who pit the cherries, and those who don’t. I like not to, because it allows the clafoutis to be ready for the oven in just a few minutes, because the pits reputedly impart flavor, and because I don’t mind removing the pits with each mouthful. It prolongs the enjoyment.

Thomas, on the other hand, is adamantly against pits. Indignant. How can I? Never mind that a clafoutis has miraculously materialized within the 15-minute half-time break of Brazil vs Chile. Still, he insists, had he known, he himself would have pitted the cherries.

Pits are polarizing. The good news is, one way or another, at the end of the day, there is cake — who is to complain? Certainly not the one who surreptitiously finished the last remaining piece to which I had been looking forward throughout all of Colombia vs Uruguay.

Practically any fruit can go into a clafoutis, but for me the craving springs with the seasons’ first cherries. Sour cherries even better. But no matter the fruit.

Pulling up in her ageless navy blue Renault 4L, my father’s fairy godmother Lily never arrived with fewer than one or two cakes, crates of homemade jams, and, always, little boxes of cotignac. But ask anyone in the family, Lily is practically synonymous with clafoutis. And, many years ago, she gave me the recipe!

Fruit
2 spoonfuls flour
5 spoonfuls sugar
3 eggs
2 glasses milk
Salt
Whiskey

Beat the ingredients together and pour over the fruit in an ovenproof dish.
(Some fruit – apples, pears, apricots – should first be allowed to brown in butter and sugar)

As far as I remember, Lily always left the cherry pits. Perhaps that is why, to me, clafoutis if foremost cherry, with pits.

photo(26)

Clafoutis de Lily
I have tried to leave the recipe, in its masterful simplicity, intact, but I’ve translated to more precise measurements and added my two cents in parentheses.

About 1 kg fruit
2 Tbsps flour (or 1 Tbsp flour and 2 Tbsps ground almonds) plus one for dusting the fruit
3 eggs
4 Tbsps sugar plus one for dusting the clafoutis
250 ml (1 cup) milk
Pinch salt
1 Tbsp whiskey (or kirsch if using cherries)

Preheat oven to 375°F (200°C).

If using apples, pears, apricots, plums, or peaches: brown the washed or pealed, cored, and quartered fruit in a large skillet with a generous pad of butter and sprinkling of sugar until golden brown. Set aside. If using cherries, pit them. Or not.

Butter an ovenproof that will fit all the fruit snugly in double layers.

Place the fruit in the dish, sprinkle with a tablespoon of flour, and toss gently to dust the fruit.

In a mixing bowl, whisk the eggs and sugar until frothy. Add the milk, then the flour, salt, and whiskey (or kirsch).

Pour the batter over the fruit and slip into the oven.

Bake for about 30 minutes, until the batter is set and the top nicely golden. In the last 5 or 10 minutes of cooking sprinkle a spoonful of sugar over the clafoutis.

Let cool.

(I much prefer clafoutis to be completely cool, though some like it lukewarm. Like the the question of pits or no pits, it is entirely up to you.)

Rhubarb rosemary jam

7 June 2014

photo(22)

This is me realizing that jam need not be a well planned out, day-long project. It can be, of course, and should, on occasion, because is there a better way to spend a day than whiling away the hours hunched over bubbling vats of sugared fruit? This is not about those days. This is about how making jam can be an afterthought, as easy as clearing out the fridge before a week-long holiday.

I was the first to consider jam making an incredibly laborious process. Carefully timed trips to the market to grab the last of the season’s fruit at an unbeatable bargain, endless kilos of berries to cut and trim and wash, giant jam pans boiling furiously for hours… I didn’t make jam very often. For one, market vendors in New York don’t usually sell off fruits for a good bargain, even as they pack up to leave  (I’ve tried); second, fruit at home often disappears so quickly I need to hide it to keep it safe (and I have); third, I don’t own a jam pan, giant or otherwise.

So I don’t (didn’t) make much jam. There were exceptions, naturally, few and far between, so noteworthy I usually recorded them, here, and here.

A few years ago my mother gave me Christine Ferber’s book (available only in French). Christine Ferber is a world re-known Frenchwoman from Alsace, widely described as the ‘fée des confitures’ (jam fairy). I’ve never actually eaten from one of her jars, but I have read so many tantalizing descriptions that I feel I might have. Taken literally, her technique is quite time-consuming, but using her inspiration, some latitude, and a little improvisation (she would be appalled), I’ve realized that making jam can actually fit quite snugly into my life.

Key is that the process in divided into two parts. In the evening, prep the fruit, mix it with sugar and lemon juice, and let it sit overnight in the refrigerator. The next day, cook the jam. Chances are, it’s easier to find 15 quick minutes in the evening and another 45 of mostly cooking time the next day, than scheduling a full long slot for the entire process.

Emboldened by this realization, last week I made jam, the easiest thing I found to save a few remaining bunches of rhubarb.

Rhubarb jam recipe

1 kg rhubarb

1 kg sugar

Juice from one lemon

Few sprigs rosemary

Wash the rhubarb, trim the ends, and chop the stalks into 1/2 inch (1 cm) pieces.

In a saucepan, mix the rhubarb, sugar, and lemon juice.

Let sit overnight in the refrigerator.

The next morning, cook the jam. Bring to a boil over medium heat and cook for approximately 30 minutes. At first it will bubble furiously, but as the jam jells it thickens, the bubbles slow down and burst at a more leisurely pace. To check whether the juice has “gelled,” take out a small spoonful and let it cool. Once cold, the juice should have thickened in the spoon, and when you try to pour it the drip is not liquid but heavy, as though it was sticking to the spoon. Cook longer if necessary and check again.

Meanwhile, sterilize the jars in boiling water for 5 to 10 minutes.

Once the jam is ready, stir in the rosemary to steep for about 5 minutes. Remove. Pour into sterilized jars and close tightly.

Jam is best stored for a few weeks (and up to a year at least) before eating.


Green asparagus salad with parmesan shavings

30 April 2014

DSC_1286

When you grow up in France or Germany, asparagus is invariably white, steamed or gently boiled, and served with some variant of Hollandaise sauce. When you move elsewhere, say to New York, your view of the world will likely deepen, expand, diversify; you will notice that asparagus can also be green.

You will learn that asparagus is, in fact, always green, that white asparagus is manually ‘blanched,’ hidden in little mounds of earth as it grows to prevent the sun from wielding its photosynthetic magic. You will discover that green asparagus absolutely should be grilled on a barbecue as soon the weather permits, or braised with a little acidity in the oven on a wintry spring evening. And, indispensably, green asparagus must also be eaten raw, in a simple salad, just like this.

DSC_1348

The tricky aspect is slicing the asparagus very thinly, lengthwise, so a good vegetable peeler is a must. My personal favorite is this kind.

Green asparagus, it should be very fresh and taut

Extra virgin olive oil

Freshly squeezed lemon juice

Good quality balsamic vinegar

Sea salt

Freshly ground black pepper

Chunk of parmiggiano reggiano cheese

Wash the asparagus. With a knife, cut off the tough end of the stalks (about 1 inch) and discard.

Cut off the asparagus heads and slice these lengthwise in halves or thirds (depending how thick they are). For the stalks, use the vegetable peeler to shave them into long strands, beginning at the thicker end.

In a serving bowl, toss the asparagus with some olive oil, lemon juice, a few drops balsamic vinegar, and salt and pepper.

Add coarse shavings of parmiggiano reggiano, and serve.

Brussels sprouts and pecorino salad

6 December 2013

DSC_0042

I nearly didn’t make this salad for Thanksgiving.

With Sam Sifton’s peremptory Thanksgiving book still ringing in my ears, I did, in fact, briefly debate the pros and cons of his strict no-salad rule. Might it diminish the lusciousness of the meal? Is it the last thing anyone wants to see on a festive table? On the other hand, this barely counts as salad. Surely by salad, Sifton means lettuce?

As it turned out, this deceptively simple dish of raw Brussels sprouts and fresh pecorino, both finely shaved and tossed with a simple dressing, was — again — undoubtedly one of the favorites of the table. On the contrary, what a welcome bounce on the palate between forkfuls of turkey and chestnut stuffing.

This dish wasn’t born as a Thanksgiving side, and shouldn’t die as one. It is a salad for any occasion. I first encountered something similar quite some years ago in the lunch bar up the block from our office in Soho. That version had walnuts, and though adding nuts would be overkill on Thanksgiving, they marry perfectly.

This is barely a recipe, just a few very good ingredients tossed together. It must be made a few hours ahead, so the dressing has time to soften the Brussels sprouts. There should be enough pecorino for a shaving or two in each mouthful.

Very fresh Brussels sprouts, preferably still on the stem because snapping them off is a fun occupation for children on Thanksgiving morning

Pecorino, not too aged

Freshly squeezed lemon juice

Sherry or good wine vinegar

Best olive oil

Sea salt

Freshly ground black pepper

Freshly hulled walnuts (optional)

Trim and remove one or two outer leaves of each Brussels sprout, then shave them finely with a mandolin or a sharp knife and lots of patience.

Cut the pecorino into paper thin shavings.

The salad is very thirsty and will soak up the dressing, so plan generously, but the proportions are roughly: 5 lemon juice plus 1 vinegar to 8 olive oil.

Season with salt and pepper. Taste the salad and adjust dressing/seasoning as necessary.

Quince fruit pastes (pâtes de fruit)

27 November 2013

DSC_0875

The truth of the matter is, rather than preparing for a blasphemously belated Thanksgiving on Saturday, for which most of my family is crossing the channel, I have been roasting quinces and simmering chutney.

Last week, friends unexpectedly brought me a big bag of quinces from their garden in the Cotswolds (I hear it is more of an orchard). I was quite excited and may possibly have briefly jumped up and down at the sight. It was a very busy week, and I was away this weekend — the quinces were becoming impatient. Quinces do hold out for a while but I wasn’t willing to tempt fate for too long, so last night I made chutney. As a first test improvised from a few recipes it is quite good, but I am not entirely happy enough to report the results here — yet. In any event, Thomas managed to save the last of the quinces from their chutney fate, begging that I make quince paste, too.

What he doesn’t know is that in the course of the morning, half of the membrillo has been transmogrified into my absolute favorite sweet: pâtes de fruit.

The preparation is the same up to the point of cutting the paste into dice or rectangles and coating them with sugar.

DSC_0889

Quince cheese recipe adapted from the River Café Cookbook (Blue)

Quinces

Sugar

Lemon

Preheat oven to 300ºF (150ºC).

Rub the fuzz from the quinces and wash well under cold water. Cut the quinces in half and place them face down in an ovenproof dish. Cover with aluminum foil and bake until the quinces feel quite soft when poked with a knife (probably 1 1/2 to 2 hours).

While the quinces are still warm, pass them through the fine mesh of a vegetable mill. (To insure a very pure paste, first remove the quinces’ core).

(The quince purée can at this point be refrigerated overnight.)

Weigh the purée, place in a saucepan, and add an equal amount of sugar and one tablespoons of lemon juice per 100g of quince.

Cook over very low heat, stirring constantly, until the paste has darkened and begins to fall off the sides. This will take a good long while, 1 1/2 to 2 hours, so take a book, newspaper, or magazine close to the stove but DO NOT leave. (I happen to know that left unattended, the paste will burn very quickly. In which case transfer quickly to another saucepan and continue cooking.)

Once the paste has reached a dark, heavy consistency, spread on a plate to cool. Once cool, cut into the desired shapes and roll in some sugar. The pastes should keep for a few weeks in an airtight container in the refrigerator.