Archive for the ‘Easy’ Category

Portuguese walnut cake

12 December 2022

Monday 12 December

It’s a snow day. Rather, it’s a snowy day, as two out of three schools are open. It’s magic! The city muffled, the children’s glee. The quiet. Louise was so excited when the first flakes started falling last night, she rushed outside barefoot.

This morning the snow was already wet, weighing the trees, but the blanket is persisting. It is so pretty. A fox is lolling on our garden table. Nose muzzled under its tail; sometimes, it yawns. It is dark amber and fuzzy, and, slowly — am I growning to accept it? They were cubs in the spring and tormented my patience scrupulously. Trampling, unnearthing, destroying every effort in the garden. Killing off even the indestructible anemones that have been there since before we moved in nine years ago. I cursed the cubs daily. But early this morning, I looked for their prints in the snow. And now, one is looking up at me through the window. I daren’t disturb it. I am growing an affection, maybe.

The cake was two weeks ago. Our friends brought a walnut cake for Thanksgiving, a recipe handed down from their grandmother, and, a few days later, when I asked Max what he wanted for his birthday, he chose the ‘snow’ cake. It took me a moment to understand what he meant — after a string of impractical requests in true nearly-7-year-old fashion: a frog cake, a chicken nugget cake… I thought the ‘snow cake’ was another joke. He meant the walnut cake with a powdering of icing sugar which we’d been gradually decimating, thin slice by tiny thin slice, since Thursday.

When I asked for the recipe, the answer was : ‘so simple, it’s mainly just eggs!’ (And nuts and sugar.) Which seems to be a hallmark of many Portuguese cakes and desserts in general. The simplicity, and the abundance of eggs.

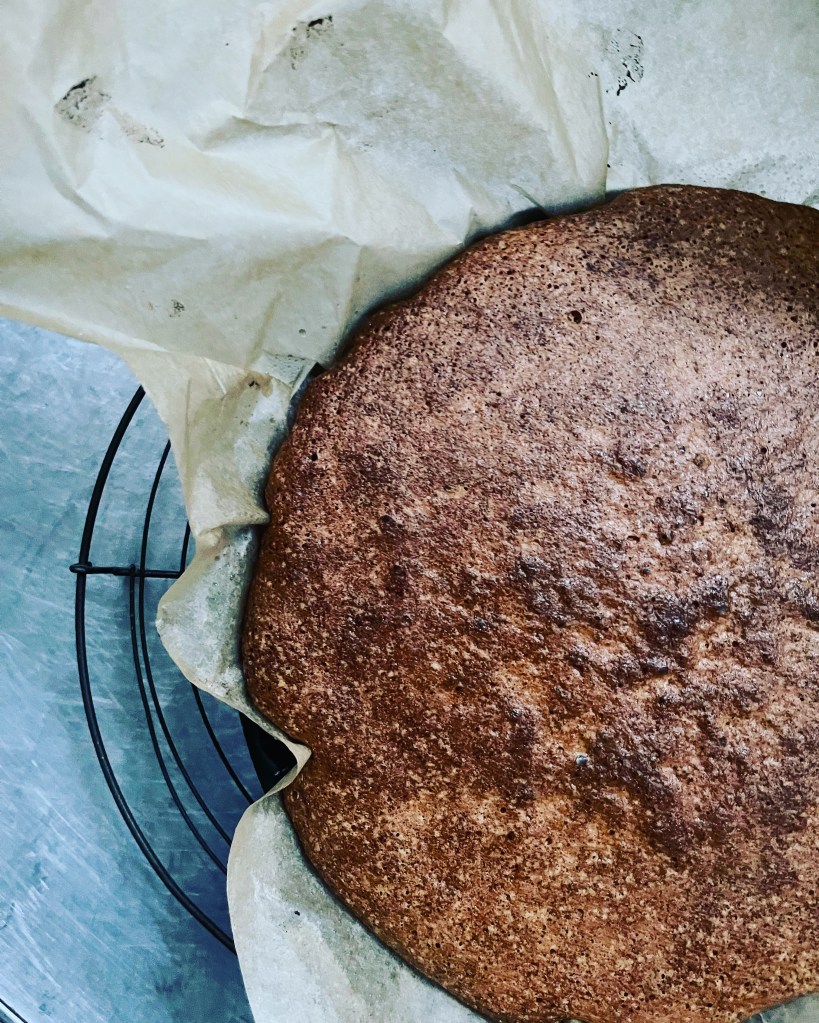
Portuguese walnut cake recipe
Such a simple recipe and such a luscious, moist cake.

250g sugar
250g walnuts, ground
6 eggs
2 Tbsps flour
Pinch of salt
A sprinkling of icing sugar for decoration

Preheat the oven to 175C (350F). Line a 24cm (9″) cake tin with parchment paper and butter generously.

Separate the egg whites from the yolks.

Mix the ground walnuts, sugar, and flour with the egg yolks.

Beat the egg whites ‘into a castle’ (a Portuguese expression which means — quite manifestly and much more poetically— to ‘stiff peaks’) and fold them carefully into the walnut / sugar / egg yolk mixture. Mix gently until the dough is uniformly coloured.

Scrape the dough into the buttered tin, slide into the oven, and bake for 25 to 30 minutes.

Let cool before removing from the tin and serve with whipped cream.

And that is why we were late for school …

All summer long ratatouille

11 July 2022

All these years and I’ve been making ratatouille backwards. For as long as I can remember, I’ve started with the aubergines and finished with the tomatoes. I don’t know why and it should (obviously!) be the other way around.

There are many ways to make ratatouille. Some profess each vegetable should be cooked separately to preserve its individual taste before all are combined and left to confit together very slowly. This sounds terribly delicious. On the other hand, the more distant origin of the word ratatouille — from the Occitan ‘ratatolha‘ — is that of a coarse (bad?) stew. And while there is nothing bad about my ratatouille (even the backwards one that was my habit!) I like its humbler origin — an effortless dish for life in summer.

The whole point of ratatouille is simplicity. Its preparation — cutting vegetables, just agree on the approximate size — can enlist anyone idling around. It is easily made in large batches for imprecise, extended, friends and family meals. It should, in fact, be made in enormous quantities because cold leftover ratatouille is even better. And in any case it keeps for a few days. It goes equally well with grilled fish, roast chicken, meat on the barbecue, as a lunchtime ‘salad,’ or stirred into a mess of eggs for a ratatouille frittata.

It is the quintessential summer dish.

Right-way-around ratatouille recipe

The quantities are suggestions only, for approximate ratio. I usually make a much larger batch.
The size and shape (cubes vs slices) into which the vegetables are prepared depends on my mood or who is cutting. The important thing is that all the vegetables follow the same principle and are roughly the same size.

Onions (3 medium)
Olive oil
Salt (I like to use coarse grey sea salt)
Garlic (4 cloves)
Red or green peppers (one)
Tomatoes (3 or 4)
Aubergine/eggplant (1 medium)
Courgettes/zucchini (5 or 6 smallish ones)
Bay leaves
Fresh rosemary, thyme, Summer savory (one or all of these)
Good wine vinegar (For this I like to make use of my small bottle of moscatel vinegar, which is slightly sweet, but any good wine vinegar is fine)

Peel the onions and cut them into large dice (or half moons).

Pour enough olive oil to just cover the bottom of a heavy-bottomed saucepan, turn on the heat (medium to low). When the oil is hot, after a brief minute, put int the cut onions, stir, salt with a good pinch, and let the onions brown, lid on (keeping an eye and stirring occasionally so they don’t burn), while prepapring the garlic and peppers.

Squish the garlic cloves with the side of a knife, remove the husk, and cut coarsely.

Wash, deseed, and cut the pepper into small cubes (or thin slices).

Once the onions are starting to turn golden, add the garlic and peppers, stir, close the lid, and let stew while preparing the tomatoes.

Wash and cut the tomatoes into chunks (or thin wedges). Add them to the pot with another good pinch of salt.

Let the onions, garlic, peppers, and tomatoes cook until they start melding and resembling a sauce.

Meanwhile, prepare the rest of the vegetables: Wash, remove the stem, and cut the aubergines (eggplant) into slices, then each slice into cubes. Wash, remove the end, and cut the courgettes (zucchini) into slices or cubes.

When the vegetables in the pot begin to ressemble a tomato-y sauce, add the aubergines and courgettes with another generous pinch of salt. Add the herbs, any mix as strikes your fancy. I think bay leaf is indispensable.

Cook for at least an hour, perhaps an hour an a half, over low heat, until all the vegetables have softened completely.

Stir in one or two tablespoons of vinegar, just enough to tease out the acidity.

Eat hot or at room temperature or cold out of the fridge the next day.

Student food (or weeknight meal) | Chicken and broccoli

28 February 2022

This is one of my favourite weeknight meals, so good and very quick to make, but I’m placing it in the ‘student food‘ category because Leo, who is currently at university, immediately asked me how to make it when he saw a picture I’d posted on instagram. Laggard that I am — I was on holiday after all — it took me a few weeks to send the recipe, in a stream of whatsapp messages, and I am happy to report that the method has already been duly tested and approved.

Here it is, all in one, more easily accessible hopefully than those bits and pieces of a conversation.

Chicken and broccoli recipe
Note: I actually use 2 different types of soya sauce — ‘light soya sauce’ which is quite salty and good to use instead of salt and tamari which is dark (but not the same as ‘dark soy sauce’) and has a deeper taste.

Recipe for 2:
200g tenderstem broccoli (or broccoli which is cheaper)
2 boneless chicken thighs (or breasts, but thighs are juicier)
One 1/2-thumb-size piece of fresh ginger
2 garlic cloves
Oil (any vegetable oil works)
Soya sauce
Rice wine vinegar
Sesame seeds

Trim off the stem ends of the broccoli. If using regular broccoli rather than tenderstem, cut it into small florets. Wash it in cold water.

To blanch the broccoli (optional but better): Put some salted water to boil in a saucepan (like for pasta). Once the water boils, cook the broccoli for just 1 to 2 minutes, then drain the water and add lots of very cold water from the tap to cool off the broccoli quickly. Drain.

Cut the chicken into chunks.

Peel and cut the ginger into matchsticks (=> first into thin slices, then each slice into sticks)
Peel and finely chop the garlic.

Heat the frying pan well, add a little oil. Put in the pieces of chicken and fry on high heat for about three to five minutes until they are nice and brown. Stir occasionally but not too often or they won’t brown.

Now pour some soya sauce and rice vinegar into the pan, about 1 to 2 tablespoons of each, and stir everything together. Add the broccoli. Cook for a few minutes more. =>> If you didn’t blanch the broccoli this will take a few minutes longer.

Move the pieces of chicken and broccoli to one side of the pan to make a bit of space, add a little bit of oil, and fry the ginger and garlic just for a minute (be careful that the garlic doesn’t burn, or it will become bitter).
Stir everything together.

Taste. Add soy sauce and vinegar if you think it needs it.

Sprinkle some sesame seeds.

That’s it! 💚

Vin d’orange

2 February 2022

Making apéritif alcohol infusions isn’t the peak or culmination of proficiency and dedication in the kitchen. Just the opposite. Few things are as easy as cutting fruit, scooping sugar, and pouring over some strong alcohol. Everyone should try it, especially anyone who wouldn’t touch a kitchen appliance with a ten-foot pole. Unlike preserving or canning, which usually involves quite a bit of prep, macerating, simmering, and sterilising of jars, not to mention the faintest hovering threat of serious poisoning, here there is no risk attached, the combination of sugar and strong alcohol makes sure of it.

One of my oldest friends, who is possibly also one who cooks the least, has been infusing rum with fruits, spices, herbs — even, I think, vegetables! — for decades. Many start as experiments, none follow a measured recipe. She has a whole trunkful at home, dozens and dozens of bottles. For years, every time we saw her, she also brought along a bottle (or two or three) of prunelle (sloe liqueur), made by her mother, who wasn’t, I understand, a particularly enthusiastic cook either. She had quite a way with prunelle, though.

This is where I got the hint. When I want to make something but have neither much time, nor much patience, I seep fruit in alcohol. And so we have jars of fruit-seeped alcohol — and alcohol-seeped fruit — in every corner of the kitchen. I have now taken up the mantle of prunelle production, I’ve made Seville orange gin, I have a traditional rum pot macerating with summer fruit, and another with dried fruit. I’ve even experimented with quince, though the ratafia needs some fine tuning.

Vin d’orange, a delicately flavoured bitter-orange apéritif originally from the South of France, is just such a project — ridiculously quick and easy. All it needs is a bit of patience (a few weeks at least), and, later, someone with whom to crack open a bottle.

Vin d’orange recipe adapted from Samin Nosrat
I tried a couple of different recipes for vin d’orange last year. I like this one best with just rosé and vodka. I’ve adjusted quantities, the recipe remains pretty much the same.

A large, closeable glass jar with a capacity of 3 litres (and later 3 clean sealable 750ml bottles)

4 Seville oranges
1 orange
1/2 lemon
180g to 200g sugar
1 vanilla bean, cut in half lengthwise
1.5 litres (= 2 bottles) of rosé wine (cheap but drinkable!)
350ml (= half a bottle) of vodka

Wash and dry the jar with a clean cloth.

Rinse all the citrus, cut them it into smallish chunks.

Place all the fruit into the jar. Add the sugar and vanilla bean, and pour in the alcohol. Mix well but gently until the sugar dissolves. Seal tightly and leave in a cool, dark place (or the fridge, if there is room!) for about a month. (Samin Nosrat suggests between 32 and 40 days, but I am pretty sure I left mine quite a bit longer last year. Whatever suits, it’s far from a perfect science!)

After about a month, when the vin d’orange has developed the right orangey and bitter taste, strain the liquid through a fine mesh sieve lined with two layers of cheesecloth into clean sealable bottles. The vin d’orange is now ready to drink, and will only get better and better.

Serve chilled, with friends.

Green asparagus with spring onions

10 June 2021

Some dishes are ideas more than recipes, they creep into our lives unawares.

I have had a few favourite asparagus recipes, and written about them, each time touting their priviledged status and every time I was completely sincere. And here I am, with yet another ‘favourite’. Seasons and appetites change, new preferences do not preclude lasting affections.

I made this simple dish last year, probably guided by the entrails of our fridge: asparagus and spring onions being (again this year) our spring staples. It remained etched in the margins of my cook’s memory. This year, it’s all I’ve wanted to do with asparagus.

Perfect company for an easy barbecue, it could also be cooked on the fire, but our balcony-intended cast-iron grill is too small and barely fits steak for six, so I make it in a skillet on the stove.

Asparagus with spring onions recipe

A rule of thumb for quantities is one third spring onions to two thirds asparagus

Asparagus (see note on quantities above)
Spring onion (see note on quantities above)
Olive oil
Soya sauce
Flaky sea salt
Freshly ground black pepper

Trim the tough ends of the asparagus stalks; rinse in cold water.

Trim the roots and leaf tips of the spring onions (I like to also remove one layer if it’s starting to wilt). Rinse the onions to remove any grit. With the blunt side of a wide knife, flatten (crush) the spring onions lengthwise.

In a large bowl, combine the asparagus and spring onions with a couple of tablespoons of olive oil, a discreet splash of soya sauce, pinch of salt, and lots of black pepper. Toss to ‘dress’ the vegetables.

If using a barbecue, grill the vegetables / if using a skillet, add a bit of olive oil and fry over high heat for 5 to 7 minutes until the vegetables are nicely coloured and still firm.