Posts Tagged ‘homemade’

Mackerel rillettes

15 May 2013

DSC_0016

Sometimes food happens without much forethought or planning. I could have pondered it for weeks, in fact I’ve been wanting to make these for years, but when I bought mackerel fillets at the market last week I had no plan; a quick weeknight dinner at best. Rillettes were far from my thoughts, lurking behind the distant corner of a hazy summer memory. But as I contemplated dinner for friends and something that could easily be made ahead, I found myself searching for mackerel rillettes recipes.

So this is adapted from one by Annie Bell, modified to suit what I had on hand. It was delicious.

*

Recipe adapted from Mackerel Rillettes by Annie Bell

8 small mackerel fillets

2 bay leaves

2 stems fresh garlic (or 3 garlic cloves)

Few sprigs fresh thyme

100 ml dry white wine

100 ml water

1 lemon

3 Tbsps very good olive oil

Fleur de sel or sea salt and freshly ground black pepper

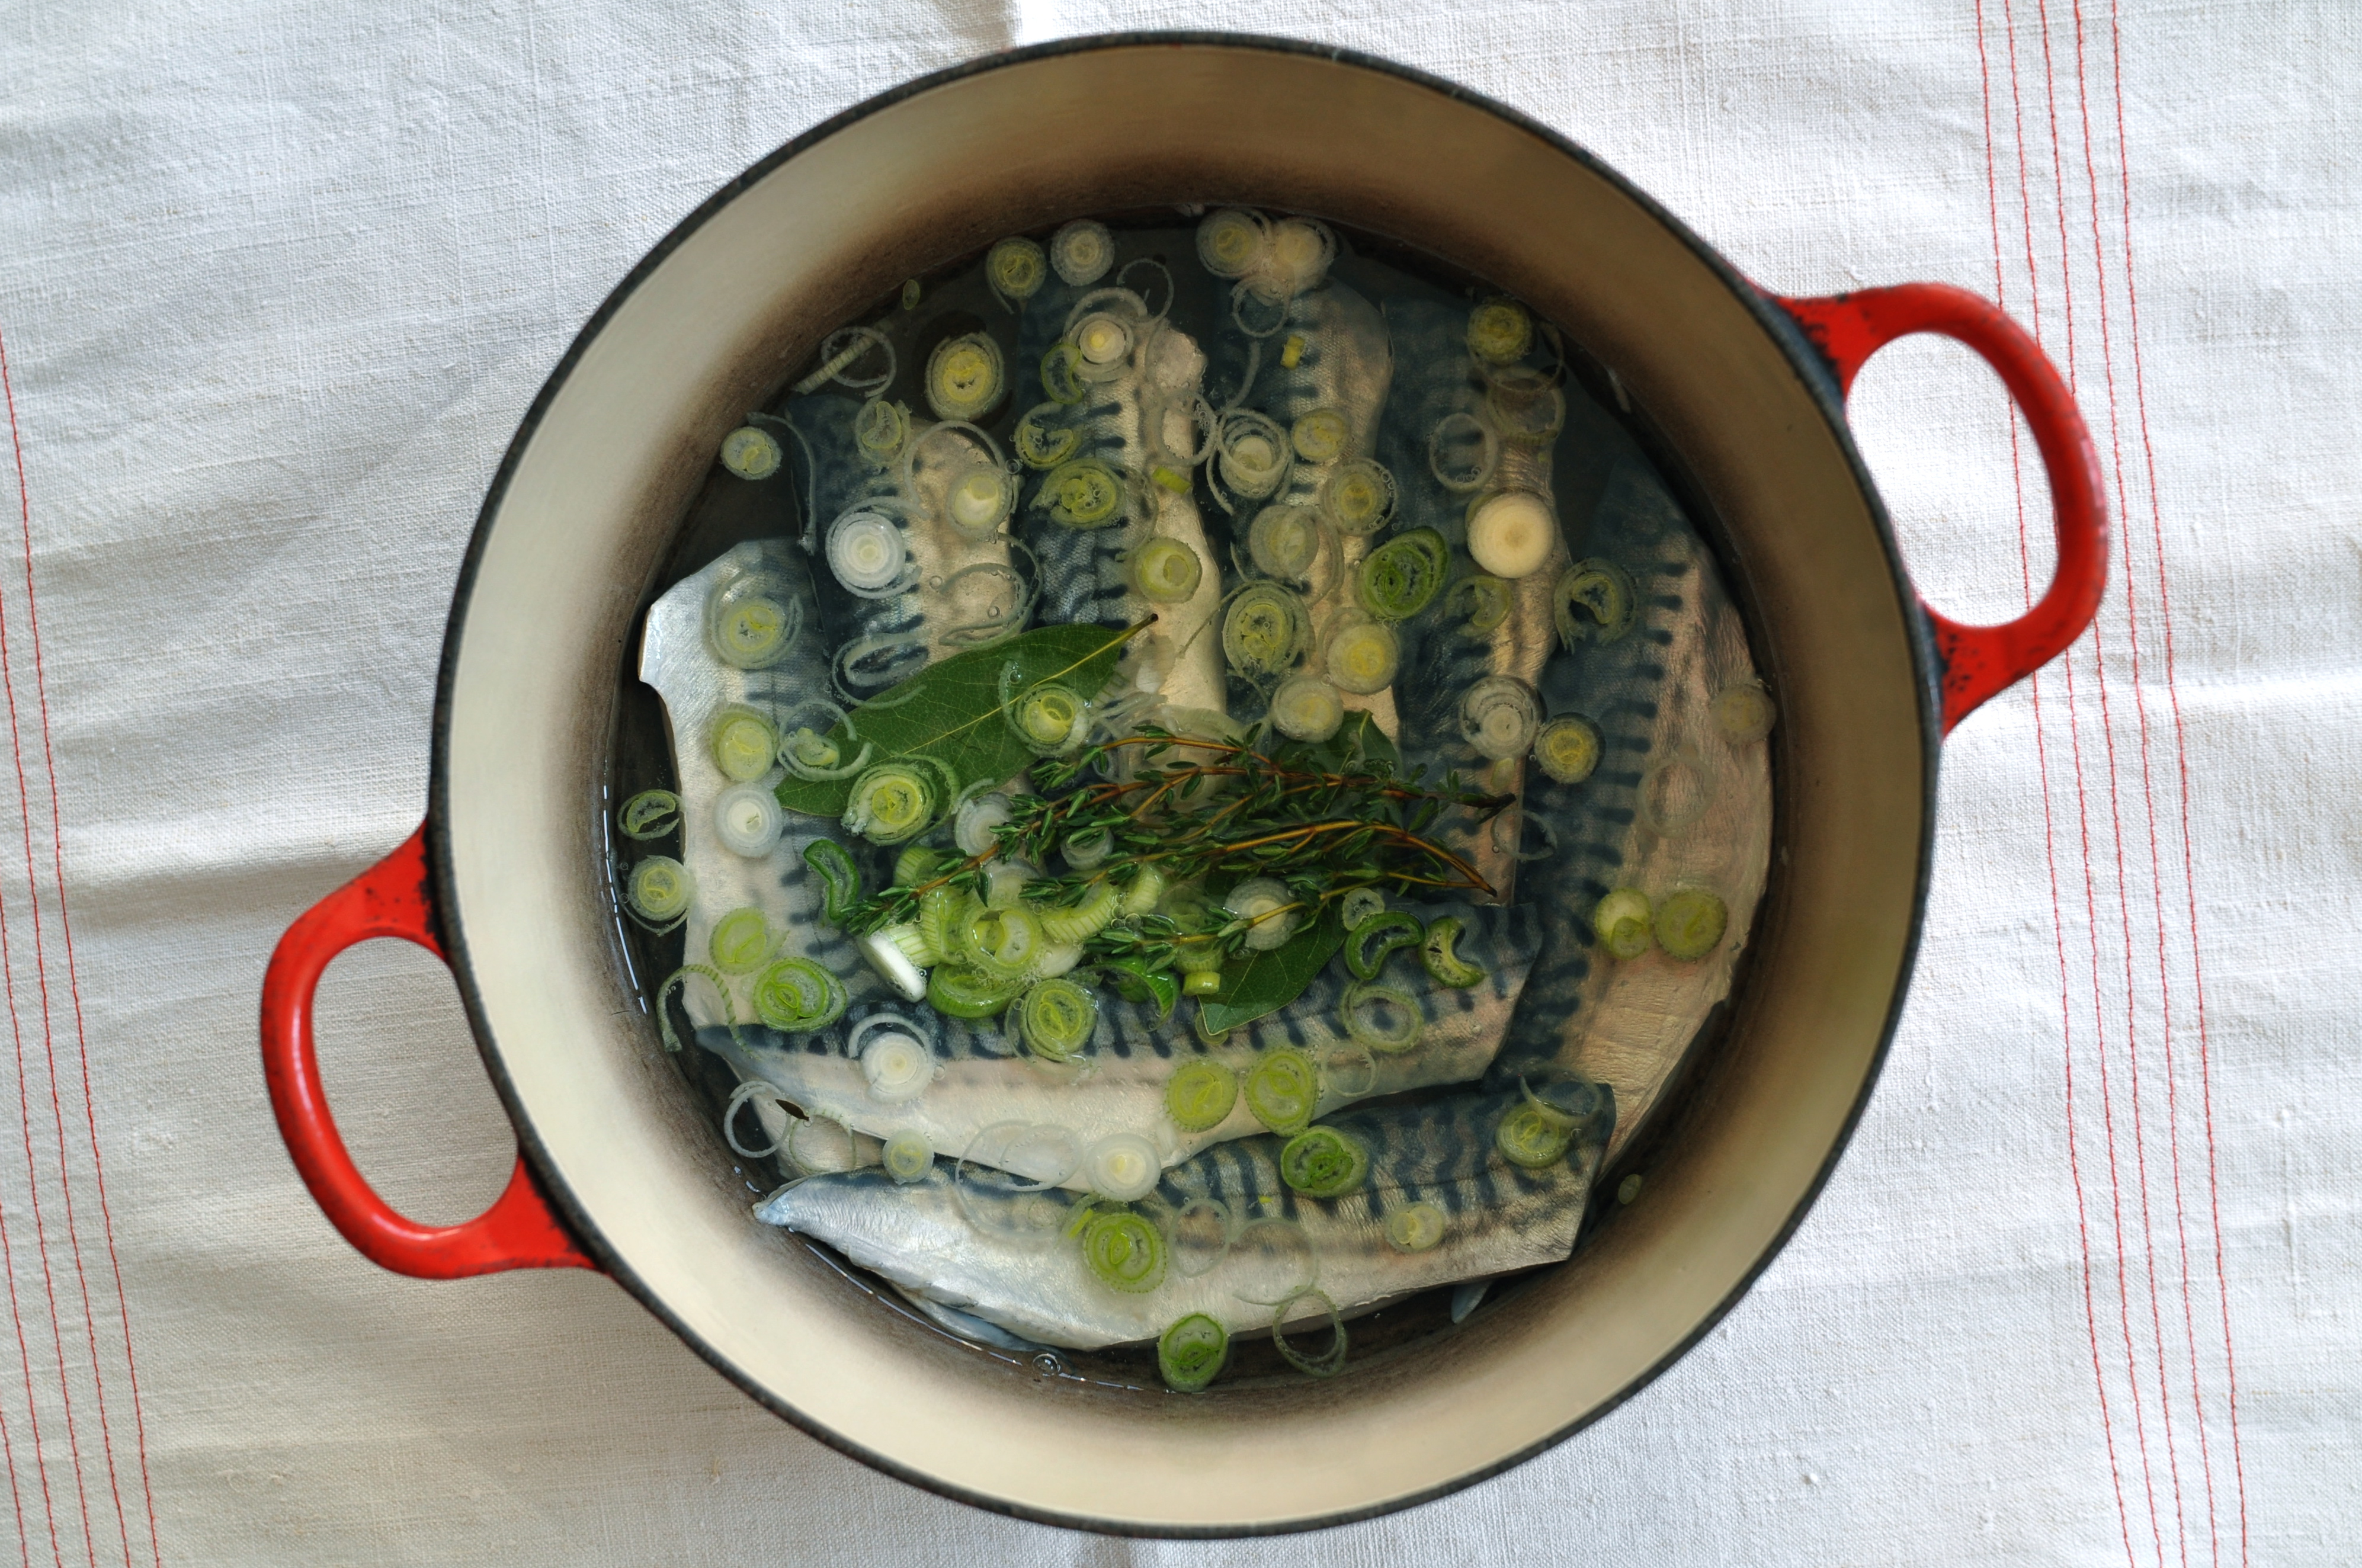
Place the mackerel fillets flat at the bottom of a pan, add the bay leaves, garlic, thyme, wine, and water. Bring to a gentle boil, simmer for 1 minute and remove from heat. As soon as the liquid is cool enough, take out the fillets and flake the fish, taking care to remove any remaining bones.

Place the cooking liquid back onto the stove, cook for a few minutes until ireduced to a couple of tablespoons.

In a medium bowl, combine the mackerel gently with the reduced liquid, the juice from 1/2 lemon (the other half for serving), and 3 Tbsps very good olive oil. Season with fleur de sel or sea salt and fresh ground pepper.

Transfer to a serving bowl or jar and place in the refrigerator for at least an hour and up to 2 days.

Serve with bread and butter, and a generous squeeze of lemon.

DSC_0014

Related posts

Cheat’s potted crab

Baked mackerel with mustard and thyme

Pork rillettes

Rhubarb rosemary syrup and a gin drink

21 June 2012

The rhubarb rosemary syrup is barely an adaptation of 101 Cookbooks‘ rhubarb rosewater syrup. It is the same recipe, but instead of adding rosewater once the syrup had cooled, I added a sprig of rosemary while it was still warm. I am entirely pleased with the result. I had seen the pairing of rhubarb and rosemary mentioned in a few places, and I love how it brings out rhubarb’s herbaceous edge.

Typically I’ve simply been using a tablespoon of this syrup with sparkling water, a good squeeze of lime, and a few ice cubes. But somewhat uncharacteristically the other day I made a drink. It was a warm evening and I wanted something light and refreshing. Here’s how I made it, on a whim.

2 tsps rhubarb rosemary syrup (recipe from 101 Cookbooks, I just substituted rosewater with a sprig of rosemary)

2 ounces gin

1 ounce rosé

A dash of sparkling water

A squeeze of lime (to taste) and one slice

A sprig of rosemary

The slice of lime and sprig of rosemary ‘garnish’ are important to add a little more edge against the sweetness of the syrup and wine. I added a few ice cubes but took them out fairly quickly as they were melting too fast and I didn’t want them to water down the drink too much (using one larger ice cube would do the trick).

Cheers!

*

Related posts

At the market | Rhubarb

Rhubarb ice cream

Cranberry sauce and a Thanksgiving menu

22 November 2010

Who wouldn’t love a holiday whose sole purpose is to share a meal? As a French woman I’ve always wondered why the French didn’t come up with that idea.

I started making Thanksgiving dinners long before I moved to the United States. The custom began with my mother, who is American (in a somewhat roundabout way), and though I cannot remember that we celebrated Thanksgiving every year as a family, I certainly picked up the tradition when I left home, and have celebrated, if not hosted it consistently since.

My first endeavor involved roasting a chicken with wild rice stuffing in a tiny countertop oven in a small Parisian studio apartment. Later, in Germany, turkeys replaced chickens as the dinner parties became larger to fit the size of the beautiful old apartments students could afford in Berlin in the 1990s (I haven’t lived in such a big apartment since!). I discovered that KaDeWe was the only store in the city to carry (frozen) turkeys in November.

Since I moved to New York I have expanded on and modified recipes, and refined a menu that to me is traditional, though it isn’t exactly, in spite of the turkey, cranberry sauce, and pumpkin pie. On Thursday I will make the dishes I have honed in recent years. In the future I am sure some things will change.

2010 Thanksgiving menu

Pumpkin leek soup

Heritage turkey with apple chestnut stuffing

Sautéed hen of the woods and king trumpet mushrooms

Mashed celeriac with parsley

Cranberry sauce (recipe below)

Pumpkin pie

And other desserts brought by the guests

***

Cranberry sauce

There is no possible excuse for buying cranberry sauce it’s so ridiculously easy to make. I usually do it the weekend before Thanksgiving.

***

3 x 12 0z (340g) bags* cranberries

3 cups (750ml) water

2 cups (450g)  sugar

Zest of 2 untreated lemons

1 Tbsp Grand Marnier (optional)

***

Place the cranberries in a large bowl, fill with water and toss to wash. If you are obsessive as I am, check through the cranberries one handful at a time to sort out the soft, discolored ones, placing the good cranberries in a colander as you go. (This is not exactly necessary, but I love the ritual and the feel of the cranberries through my fingers… Otherwise just strain the berries through a colander.)

In a medium saucepan, dissolve the sugar in the water and bring to a boil, stirring occasionally. Add cranberries and lemon zest, mix and let simmer for 15-20 minutes, stirring occasionally, until the cranberries have popped. Remove from heat and mix in some Grand Marnier if desired.

Once cool, transfer to a jar or bowl and refrigerate (if you make the cranberry sauce a while in advance, sterilize the jars in boiling water, pour in cranberry sauce while hot, and seal tightly).

*For some reason, cranberries are practically always sold in 12 oz bags, so I started using that as the reference.

Quince paste

3 November 2010

Quince paste, also known as membrillo in Spain or cotognata in Italy, is a thick, sweet fruit paste that pairs perfectly with Manchego and other types of hard sheep’s milk cheeses. It keeps for a while though it never lasts long. I eat it off the tip of a knife when the children aren’t looking. It’s irresistible.

I use the fruit cooked to make quince jelly for this recipe, but the quinces could also be baked, covered, in a low oven (300°F or 150°C) for about 1 1/2 hours.

***

Stewed quinces (without the juice) or baked quinces (hard cores removed)

Sugar

Lemon juice

***

Purée the quinces with a vegetable mill (the skins and seeds will be retained by the mill).

Weigh the purée and add the same amount of sugar in a heavy-bottomed saucepan. Add the juice from half a lemon per 2 lb (1 kg) of fruit. Mix, bring to a lively boil, and stir constantly (otherwise the quince will burn very quickly) until the mass darkens and thickens. Depending on the amount of purée, it may take more than an hour.

Pour onto a large flat plate or shallow container and let set. Quince paste keeps for months in the refrigerator.

Quince jelly

3 November 2010

I made quince jelly last year for the first time. It’s not that I don’t sincerely love quince, it’s because I don’t like making jelly very much. To make jelly the fruit is cooked in water, and only the clear juice is used. An awful lot of pulp is wasted in the process. Of course it can be used as a purée to eat with yogurt, but it does not last, and there is only so much quince purée a family can eat in a couple of days. For this reason I don’t make jelly, generally. But last year as quinces appeared at the market I simply couldn’t resist. Having made the jelly (a few pounds of quinces rendered three very small jars), I had a lot of quince pulp on my hands, and dismayed at the idea that it might go to waste, I suddenly thought about membrillo, the Spanish quince paste that pairs so perfectly with Manchego and other hard sheep’s milk cheeses. As it happens, all that is required for quince paste is fruit pulp and sugar.

So making quince jelly has become a perfect excuse to make quince paste (or the other way around?), and I think no recipe for one should ever be published without the other.

***

Quinces

Water

Sugar

***

Making jelly is a fairly long process, but it can be broken up into 2 stages if you don’t have a big uninterrupted chunk of time.

Wash quinces thoroughly to remove fuzzy coat. Cut quinces into quarters or eighths, depending on the size of the fruit so all the pieces have approximately the same size. Place quince pieces in a large, heavy-bottomed saucepan and add just enough water so it reaches the top layer of quinces but does not cover the fruit. Bring to a boil and simmer gently until the fruit becomes soft, stirring occasionally to submerge the fruit on top so it gets a chance to cook through. Poke around to check that all the pieces have softened (quinces will cook through at a different rate depending on how ripe they are – it could take up to 1 1/2 hours). Once all the quince is very soft, remove from heat.

**You can take a break at this point. Leave the quinces in the water, let cool and place in refrigerator once cool for up to 24 hours. If you refrigerate the cooked fruit, you will have to reheat it slightly to release the liquid before starting the next stage.**

Strain the juice through a fine mesh sieve and then through a cheesecloth to remove any impurities. Don’t mash the fruit or squeeze the cheesecloth too much or the jelly will become murky. Reserve fruit pulp for paste (refrigerate unless using immediately).

Measure the juice as you pour it into a (smaller) heavy-bottomed saucepan. For every cup (250 ml) of juice, add 2/3 cup (150 g) sugar. Bring to a boil and simmer, skimming off any foam that forms on the surface. After about 20-30 minutes, check regularly whether the juice has “gelled.” To do this take out a small spoonful and let it cool. Once cold, the juice should have thickened in the spoon, and when you try to pour it the drip is not liquid but heavy, as though it was sticking to the spoon.

Sterilize jars in boiling water for 5 to 10 minutes. As soon as the juice has “gelled,” remove from heat and pour immediately into sterilized jars and close tightly. Keeps unopened for up to a year; once opened should be stored in the refrigerator.